Configuring YubiKey
Method
One method to use as your Multi-factor Authentication (MFA) is using a Yubikey, but only if you do not have a cell phone. The following instructions guide you through this process. This method does require you to stop by the Technology Help Desk at in the Timothy J. Nelson Innovation Center.
overview
In order to connect to log into NMC online protected resources (i.e. MyNMC, MySuccess, etc.) or NMC’s VPN service, we require Multi-Factor Authentication (also called MFA) to enhance security. You can use your phone to set up MFA using Advanced Authentication, but if you can't / don't want to use your personal mobile phone for authentication then we offer an alternative: a YubiKey. A YubiKey is a hardware device that you plug into your computer to use as a second factor when logging in. It's like a thumbdrive, only cooler.
Click here if you DO NOT use the NMC VPN ( FIDO2 method)
Configuration
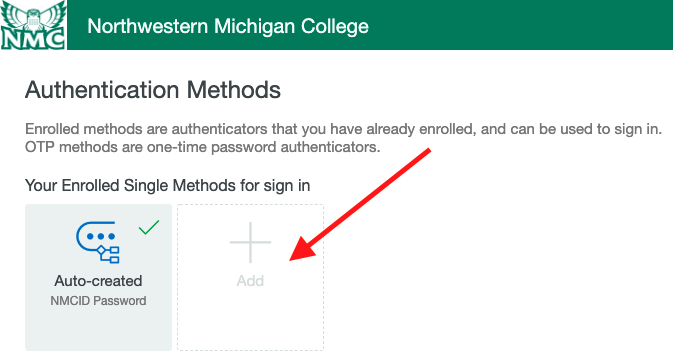
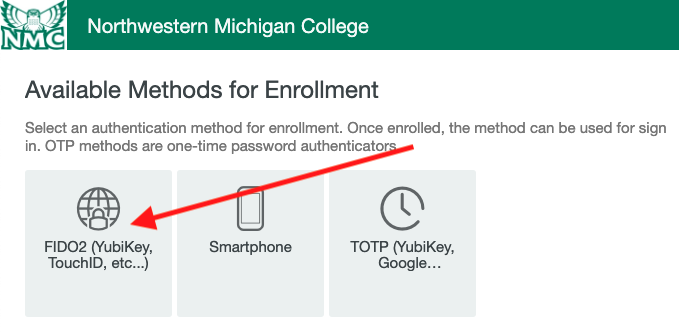
Plug your YubiKey into your computer but don't do anything with it yet. Now open a browser (Chrome or Firefox). Go to auth.nmc.edu on your computer and log in with your NMCID and password. Once logged in, you should see the Authentication Methods screen ( figure 1). Select "Add" then select "FIDO2 (YubiKey, TouchID, etc...)" ( figure 2):
Selecting An Authentication Method
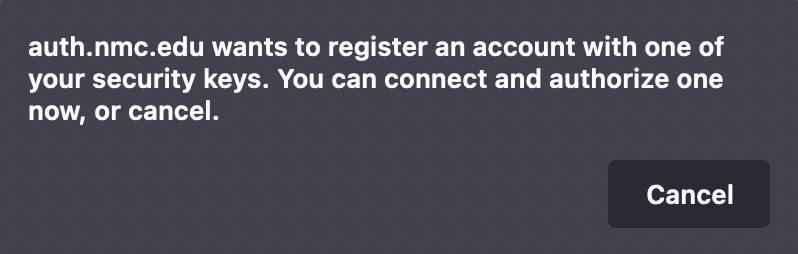
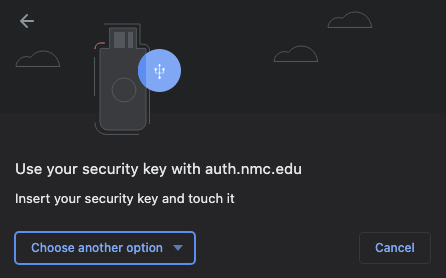
On the next screen, change the display name to whatever you like or just keep the default. Now click "Detect Device" and you should see a pop-up similar to the one of the ones below depending on if you're using Chrome ( figure 3) or Firefox ( figure 4)
Registering Your YubiKey

If you're using Firefox, simply touch your YubiKey to authorize it. If you're using Chrome, click "USB security key" and you should be prompted to touch your YubiKey ( figure 5). Regardless of the browser you're using, once you've touched the YubiKey, you will see a confirmation screen ( figure 6)
Authorizing Your YubiKey
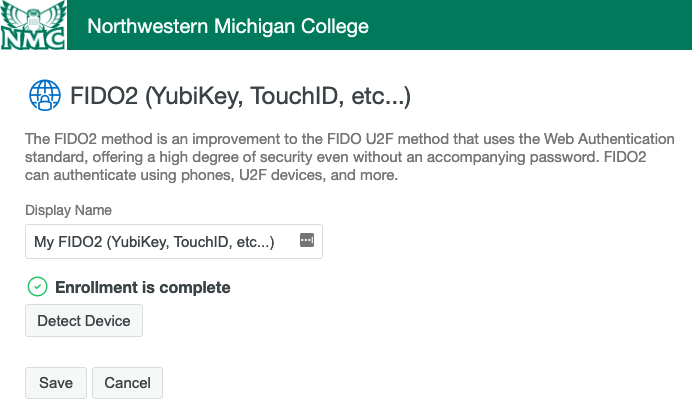
Now click the "Save" button.
If you skip this last step, nothing you just did will count and you'll have to start over.
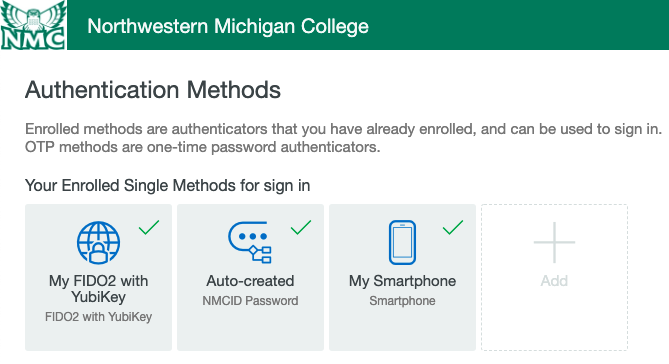
You'll see a pop-up with a green check mark indicating that your "My FIDO2 (YubiKey, TouchID, etc...)" was saved successfully ( figure 7) and it will now show up under your list of available authentication methods ( figure 8). Your YubiKey is now set up for use with NMC's systems.

Testing Your YubiKey
In order to test and verify that everything is set up properly, click on the "My FIDO2" (or whatever you might have renamed it to) authentication method, then click on "Test method". Next, click on "USB security key" in the pop-up box and touch your YubiKey when prompted. You should see a "Test successful" message. If not, delete this authenticator and re-add it.
Click here if you DO use the NMC VPN ( Yubico Authenticator method)
Configuration
In order to use a YubiKey, you need to do 2 things: install an app called "Yubico Authenticator" ( download link) on your computer, and then register the YubiKey with NMC’s systems. Install the Yubico Authenticator app just like you would any other app.
PLEASE NOTE
If you are installing the Yubico Authenticator on an NMC-owned device, then you'll have to install it via the Software Center. The instructions for doing so are here.
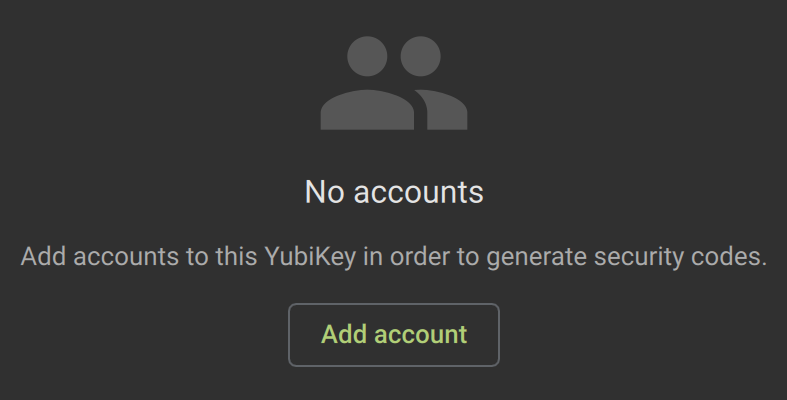
Once that's done, run it and you will be prompted to insert your YubiKey into your machine ( figure 1). Once that's done, it should read that you have "No accounts" ( figure 2) - this is expected behavior:
Getting Started With YubiKey

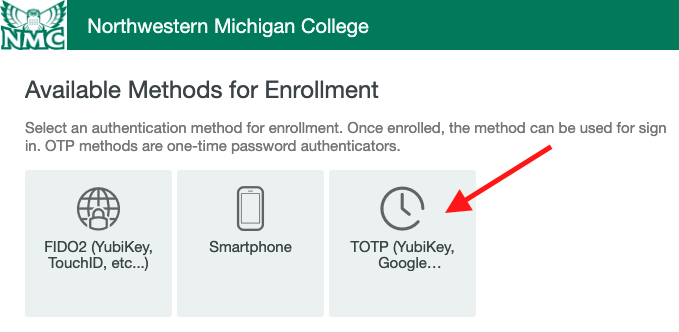
Leave the Yubico Authenticator running and open a browser (Chrome or Firefox). Go to auth.nmc.edu on your computer and log in with your NMCID and password. Once logged in, you should see the Authentication Methods screen ( figure 3). Select "Add" then select "TOTP (YubiKey, Google...)" ( figure 4):
Selecting An Authentication Method
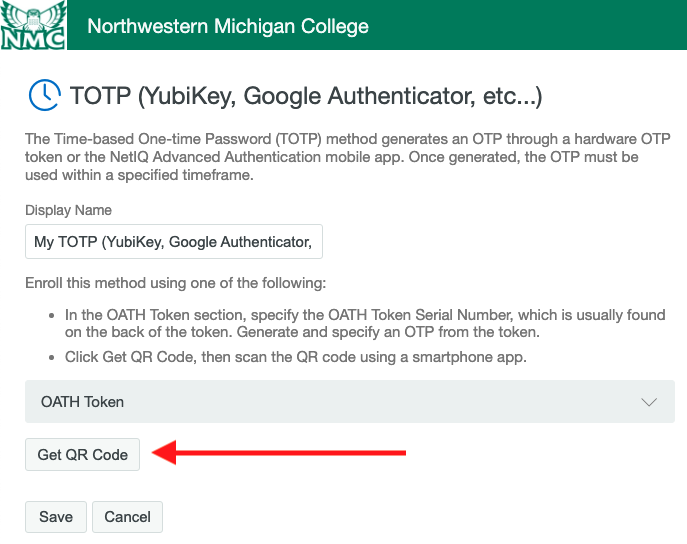
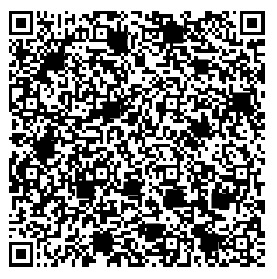
Type something in the "Display Name" field or leave the default if you like ( figure 5). Select "Get QR Code" and a QR code similar to the one below will appear ( figure 6):
CONFIGURING YOUR YUBIKEY
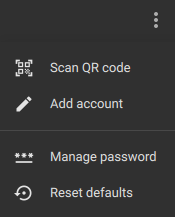
Next, you're going to use the Yubico Authenticator to scan the QR code. Go back to the Yubico Authenticator and drag it next to - but not covering - the QR code. Click the three vertical dots in the upper-right and choose "Scan QR Code" ( figure 7). If all goes well, you should see a new screen with "Netiq" on it ( figure 8):
CONFIGURING YOUR YUBIKEY
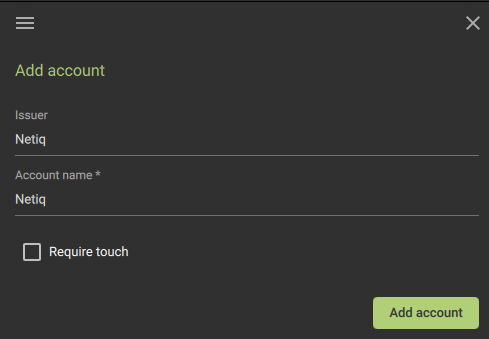
Where it reads "Netiq" replace them both with "NMC", click the "Require touch" box, and then click "Add account". In your browser, click "Save" underneath the QR code.
If you skip this last step, nothing you just did will count and you'll have to start over.
Your YubiKey is now set up for use with NMC's systems.
Testing Your YubiKey
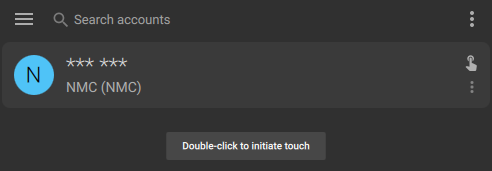
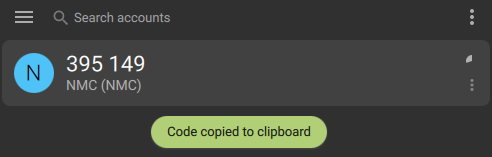
In order to test and verify that everything is set up properly, click on the "My TOTP" (or whatever you might have renamed it to) authentication method, then click on "Test method". A pop-up box will prompt you for the password. What it really means is the 6-digit code that the YubiKey will generate for you. To get that code, go back to the Yubico Authenticator and you should see stars ( figure 9). Double-click on the stars and then touch the YubiKey when prompted. This will show you the code as well as copy it to your clipboard ( figure 10):
Type or paste the code into the box that reads "TEST YUBIKEY METHOD" and click the "Test" button. If all went well, you should see a green checkmark and the words "Test successful". If not, delete this authenticator and re-add it. If you need to continue on and configure VPN access, the directions for configuring VPN access are here.
If you encounter issues that are not addressed in this document, please feel free to submit a helpdesk ticket, reach out the Technology Help Desk at (231) 995-3020, or chat with them at nmc.edu/help.